Articles > Coffee Brewing Methods
The proper method for cleaning coffee equipment is crucial for both optimal flavor and hygiene. To maintain the quality of your coffee, it is important to clean your coffee maker, grinder, and other related equipment regularly.
For coffee makers, start by removing and washing the filter and carafe after each use with warm, soapy water. Then, run a solution of equal parts water and vinegar through the machine to remove mineral buildup. Rinse thoroughly with water. For grinders, disassemble the grinder and brush out any leftover coffee grounds and oils. Wipe with a damp cloth and let it air dry.
It is recommended to clean your coffee equipment at least once a month, or more frequently if used daily. Neglecting to clean your equipment can not only result in a decrease in flavor quality, but also pose a health risk due to the build-up of bacteria and mold.
In conclusion, proper cleaning of coffee equipment is essential for both maintaining the quality of your coffee and ensuring the hygiene of your equipment. Regular cleaning will not only protect the flavor of your coffee but also extend the lifespan of your equipment.
Regularly cleaning your coffee equipment is essential for maintaining the quality of your brew and ensuring the longevity of your machines. By keeping your equipment clean, you can prevent the build-up of coffee oils, residue, and bacteria, which can negatively impact the taste of your coffee and potentially lead to health risks. In addition, regular cleaning can also prevent clogging and damage to your equipment, saving you time and money on repairs. In this article, we will explore the importance of cleaning your coffee equipment, as well as provide some tips and guidelines for maintaining a clean and efficient brewing setup.
Regularly cleaning coffee machines and accessories is essential to prevent the buildup of coffee residue, which can negatively impact the taste and quality of your coffee. Using hot soapy water to clean the different components of the coffee machine helps to remove any oils, grounds, and other residue that may have accumulated over time. It is important to pay special attention to the nooks and crannies where residue tends to hide, using a soft brush to thoroughly scrub these areas.
In addition to regular cleaning with hot soapy water, it is also beneficial to run a cleaning cycle using a solution of equal parts water and vinegar. This helps to further break down any stubborn residue and eliminate any lingering odors. Vinegar is known for its natural cleaning properties and can effectively remove mineral deposits and coffee oils from the machine's internal components.
By regularly cleaning and maintaining your coffee machine with hot soapy water and vinegar, you can ensure that your coffee tastes fresh and flavorful with each brew. This simple yet important maintenance routine can help to prolong the life of your coffee machine and preserve the quality of your coffee.
To maintain the quality of your coffee, it is crucial to follow a few specific steps. First, it is important to store your coffee in an airtight container to protect it from exposure to oxygen, which can quickly degrade its flavor. Additionally, it should be kept away from heat and light, as these elements can also negatively impact its taste.
Grinding your coffee just before brewing is another essential step in preserving its freshness. This is because ground coffee has a larger surface area than whole beans, which makes it more vulnerable to oxidation and flavor loss. By grinding it shortly before brewing, you can ensure that the maximum amount of flavor and aroma is retained.
Finally, using filtered water for brewing is important for maintaining the quality of your coffee. This is because tap water can contain impurities and chemicals that can alter the taste of your coffee, while filtered water ensures a cleaner, more pure flavor.
By following these steps, you can help to preserve the flavor and freshness of your coffee over time, resulting in a more enjoyable and satisfying cup every time.
Regular cleaning and descaling are crucial for extending the lifespan of your coffee maker. Over time, mineral deposits and coffee oils can build up in the machine, causing clogs and affecting the taste of your coffee. Descaling removes these deposits, improves efficiency, and ensures that your coffee maker continues to brew great-tasting coffee.
Proper maintenance also plays a key role in prolonging the life of your coffee maker. Use filtered water to reduce mineral build-up and replace worn parts, such as the filter and gaskets, to prevent leaks and maintain the machine's performance.
To keep your coffee maker in top condition, establish a cleaning routine. Clean the removable parts after each use and descale the machine at least once a month, or as often as recommended by the manufacturer. Following these tips will not only extend the life of your coffee maker but also ensure that you continue to enjoy delicious coffee every day.
When it comes to keeping your living space tidy and organized, having the right materials for cleaning is essential. From dusting and mopping to scrubbing and vacuuming, having the proper tools and supplies can make the task much easier and more efficient. Whether you're tackling a deep spring cleaning or simply maintaining a daily cleaning routine, having the right materials on hand can make a world of difference in the outcome. In this section, we will discuss the essential materials needed for cleaning and maintaining a clean and healthy living environment.
White vinegar is a versatile liquid with a wide range of uses in cooking, cleaning, and as a natural remedy. It is commonly made through the fermentation of diluted alcohol, making it a natural and eco-friendly product. In cooking, white vinegar is often used to pickle vegetables, adding a tangy flavor and preserving them for a longer shelf life. It can also be added to marinades, salad dressings, and sauces to add acidity and enhance flavors.
In cleaning, white vinegar is an effective and natural disinfectant. It can be used to remove stains, clean windows and mirrors, and even neutralize odors in the kitchen and bathroom. Additionally, white vinegar can be used as a natural remedy for various ailments. It is known to soothe sunburns, relieve itchy insect bites, and alleviate the symptoms of a sore throat when mixed with warm water and honey.
Overall, white vinegar is a multi-purpose product that can be found in most households due to its numerous uses. From cooking and cleaning to natural remedies, white vinegar is a valuable asset for any home.
When it comes to effectively using dish soap to wash dishes and remove tough grease and grime, there are a few key methods to keep in mind. First and foremost, it's important to use a proper concentration of dish soap. Too little soap may not effectively cut through grease, while too much can leave behind a soapy residue.
To properly wash dishes with dish soap, start by filling the sink with warm water and adding a few drops of dish soap. Using a sponge or dishcloth, gently scrub the dishes, making sure to pay extra attention to areas with tough grease and grime. For particularly stubborn spots, allow the dish to soak in warm, soapy water before scrubbing.
Once the dishes have been washed, it's crucial to properly rinse them to remove any remaining soap. Residual soap can leave behind a film and affect the flavor of your food. Rinse each dish thoroughly under running water and allow them to air dry or dry with a clean towel.
By using the proper concentration of dish soap and taking care to thoroughly rinse the dishes after washing, you can effectively remove tough grease and grime while leaving your dishes clean and residue-free.
To properly warm water for various cooking and household tasks, it is important to use the appropriate temperature for the specific use. For brewing coffee, the ideal temperature is around 120°F, while boiling pasta requires water to reach a temperature of 212°F. On the other hand, washing dishes typically calls for water around 140°F. To achieve these precise temperatures, always use a reliable thermometer to ensure accurate temperature control.
When warming water for cooking, start by filling a pot with the amount of water needed and then use the thermometer to monitor the temperature as it heats up. Adjust the heat as necessary to reach the desired temperature, and then proceed with the cooking task. For household tasks like washing dishes, simply adjust the temperature of the water heater to reach the recommended 140°F.
By maintaining the correct water temperature for different tasks, you can ensure that your cooking and household chores are done effectively and efficiently. Remember to always use a thermometer to achieve the desired temperature for the best results.
When dampening a cloth for cleaning purposes, it is important to ensure that it is not overly wet but still effective at picking up dust and dirt. To properly dampen a cloth, run it under water, then wring out any excess moisture until the cloth is slightly damp to the touch. This will allow the cloth to pick up dirt and dust without leaving the surface overly wet.
A damp cloth is safe to use on a variety of surfaces, including wood, glass, and metal, as long as it is properly wrung out. Using a damp cloth on these surfaces can help to effectively remove dirt and grime without causing any damage.
When using a damp cloth for cleaning, it is important to regularly rinse and wring out the cloth to ensure that it remains effective at picking up dirt and dust. Additionally, it is best to avoid using a damp cloth on delicate surfaces such as electronics or sensitive fabrics, as it may cause damage. By properly dampening a cloth and using it on suitable surfaces, it can be an effective tool for cleaning and dusting.
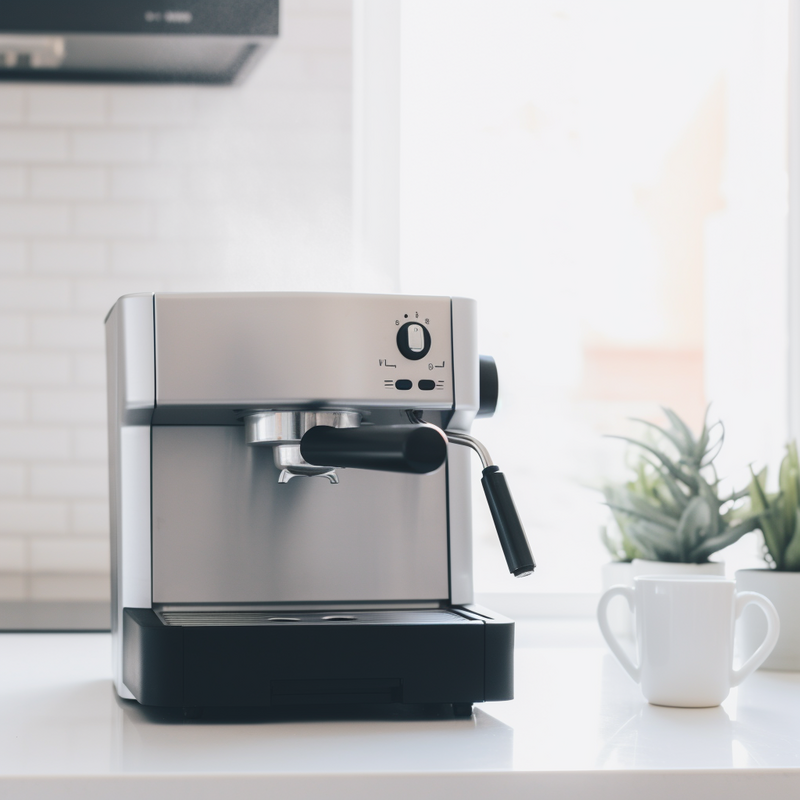
Coffee machines are a staple in many households and offices, providing a quick and convenient way to enjoy a delicious cup of coffee. However, ensuring that your coffee machine is properly cleaned and maintained is essential for the best tasting brew and to prolong the life of the machine. Regular cleaning can also prevent the build-up of coffee oils and minerals that can affect the taste and quality of your coffee. In this article, we will discuss the step-by-step cleaning process for coffee machines, including simple and effective ways to keep your machine in top condition. Whether you have a traditional drip coffee maker, a single-serve pod machine, or an espresso maker, proper cleaning is key to enjoying the perfect cup of coffee every time.
Before beginning any maintenance or repair on the coffee maker, it is crucial to prioritize safety. To ensure no risk of burns or electrical shock, the first step is to unplug the coffee maker from the power source. Once unplugged, it is essential to allow the machine to cool down for at least 10 minutes. This cooling period is necessary to avoid any potential injury, as the internal components of the coffee maker can remain hot even after turning it off.
During this time, it is important to refrain from attempting to disassemble or clean the coffee maker. Doing so could result in burns or other injuries, as well as potentially cause further damage to the machine. It is crucial to prioritize safety by allowing the coffee maker to cool down completely before proceeding with any maintenance or repair.
By following these safety measures and allowing the coffee maker to cool down, you can minimize the risk of injury and ensure a safe environment for any necessary maintenance or repairs.
To remove the brew basket and filter basket from the coffee maker, start by opening the lid of the coffee maker. The brew basket is usually located under the lid, while the filter basket is just below it. Hold the handle of the brew basket and lift it out of the coffee maker. The filter basket can be removed by grasping the handle and pulling it out as well. Once both baskets are removed, they can be washed with warm, soapy water. Use a sponge or brush to gently scrub any coffee stains or residue. After washing, rinse the baskets thoroughly to ensure that no soap residue remains.
It's important to regularly wash the brew and filter baskets to maintain the cleanliness and quality of your coffee maker. This will also prevent any build-up of old coffee grounds and oils that can affect the flavor of your coffee. After washing and rinsing the baskets, make sure to dry them completely before placing them back into the coffee maker.
By following these steps, you can easily remove and wash the brew basket and filter basket of your coffee maker to keep it in top condition.
After gently scrubbing the inside of the water reservoir with warm soapy water and a sponge or brush to remove any buildup or residue, it is crucial to rinse thoroughly with clean water. This step is important to ensure all the soapy residue is removed from the reservoir.
Rinsing will also help to eliminate any lingering soap taste or scent that could potentially transfer to the water and affect the taste of your coffee. After rinsing, it is essential to allow the water reservoir to air dry completely before reassembling the coffee maker.
Drying the reservoir thoroughly will prevent any residual moisture from causing mold or mildew to develop, which could contaminate the water and affect the taste of future brews. Once the reservoir is completely dry, it can be reassembled into the coffee maker for the next use. Following this cleaning process at regular intervals will help to maintain the quality of your coffee and ensure the longevity of your coffee maker.
Once the 1:2 ratio of white vinegar and water solution has been poured into the coffee maker's water reservoir, it is time to run a brewing cycle to clean the machine. To do this, simply start the coffee maker as if you were making a regular pot of coffee. The mixture of white vinegar and water will pass through the inner workings of the machine, helping to remove any built-up residue and mineral deposits.
After the brewing cycle is complete, discard the vinegar-water solution and rinse the water reservoir thoroughly. Then, refill the reservoir with clean water and run another brewing cycle. This will help to flush out any remaining traces of vinegar and ensure that your next pot of coffee isn't tainted by the taste of vinegar.
Running a brewing cycle with white vinegar and water is an effective way to clean a coffee maker and remove any lingering impurities that can affect the flavor of your coffee. It's a simple and inexpensive maintenance task that can help to prolong the life of your machine and ensure that every cup of coffee tastes fresh and delicious.
 Author: Dave Smiley